This knit gift idea will be much loved by any recipient with cold winter feet, and is shockingly fast to knit up! I designed these slippers in my early knitting years, when I was still very inexperienced, so they are way simple, using only knit stitch, increases and decreases, and some knitting in the round with double-pointed needles. Unlike many slipper patterns that are knit large and then felted, these slippers are knit on size 11 needles with several strands of yarn, making a thick, dense fabric, so no felting is needed.
You can find Booties pattern on this link to download the pdf file directly. All slipper instructions are in the pattern.
You can find Booties pattern on this link to download the pdf file directly. All slipper instructions are in the pattern.
This is what your finished slippers should look like before you add the buttons.
The slipper pattern calls for two decorative buttons at the ends of the straps, and since the buttons are not functional but only for looks, I love using bottle caps instead! I'm always one to use recycled materials in my crafts whenever possible, so putting a couple of fun bottle caps on a pair of slippers instead of buttons is my kind of modification!
Of course, you can use this bottle-cap button concept for items beside the slippers—how about adding a few embellishments to a beer-lover's hat gift? Or sewing a cluster of them onto a bag? Fun stuff!
You'll need:
Of course, you can use this bottle-cap button concept for items beside the slippers—how about adding a few embellishments to a beer-lover's hat gift? Or sewing a cluster of them onto a bag? Fun stuff!
You'll need:
- Two bottle caps
- A hammer
- A thin nail
- Sandpaper
- A sewing needle or tapestry needle
- Embroidery floss or yarn
I chose bottle caps from two of my favorite Oregon breweries—you could use Thomas Kemper or Henry Weinhards soda caps if you want to keep it nonalcoholic.
With a thick piece of cardboard or a newspaper protecting your work surface, hold each cap on its side and hammer around the edges to smooth down sharp points.
Keep hammering around the cap several times until it's all even.
Sometimes there will be a point that won't want to smooth out—just stop when it's all smoothed enough that it won't injure anyone or tear the slipper yarn.
The left one hasn't been hammered yet, and the right one has—see the difference?
When you have squashed all sharp points, it's time to punch the holes. Hammer the nail through the top of the cap in two spots, or four or more spots if you want.
The nail goes through the cap pretty easily. When the nail is all the way through, wiggle it around a little to open up the hole.
Buttonhole! The back sides of the holes are probably sharp with pointy bits of metal sticking out, which could cut the yarn or thread you use to sew on the caps.
Those pointy bits are no good! So take some rough sandpaper and sand down the hole backs until they aren't so sharp. It doesn't have to be totally smooth—just sanded enough so it won't cut the yarn or thread. Now you have two handmade buttons, personalized for your particular slipper gift!
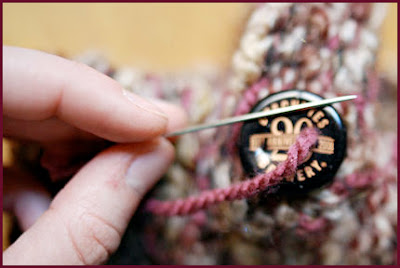
Four-hole bottle-cap buttons would look cool, too! Sew them onto your slippers and your gift is complete! If you use yarn, you only need to stitch it on once; there's no need to go back through the holes again if it seems secure.
Using a yarn that's used in the slippers can help with continuity. Repeat for the second slipper. Tie tightly and weave in the ends. Ta-da!
Ready for gifting to a beer-loving friend! And now for some other examples! If your loved one has a special attachment to a particular beer (or soda), how about designing the entirety of the slippers around that beverage?
Newcastle booties for any British brown ale fan. And another...
A bottle cap with a graphic design like Red Stripe is extra adaptable to a matching slipper design. Lastly, if you can't find bottle caps that you like, you could decoupage your own images onto the caps for completely handmade, personalized buttons! Be creative!
From... www.craftstylish.com


Comentarios